Your cart is currently empty!
How to “re-awaken” your milk kefir grains
•
… and continuously make more!
When you order live milk kefir grains from Keetna Farm Goods, you’ll receive 1 heaping tablespoon of active grains, bagged in a container, cozily packed in a box.
It’s best to open and start growing your kefir ASAP. You can put the grains in the fridge for up to 7 days for guaranteed freshness. But the earlier you get started, the better.
The Complete Milk Kefir Growing Instructions
What You’ll Need:
- 1 teaspoon of Milk Kefir Grains (in the container)
- 12-16oz of dairy milk (any variety is fine…1%, 2% or whole, raw? Your choice). IT IS NOT recommended to use Ultra pasteurized milk.
Your First Batch
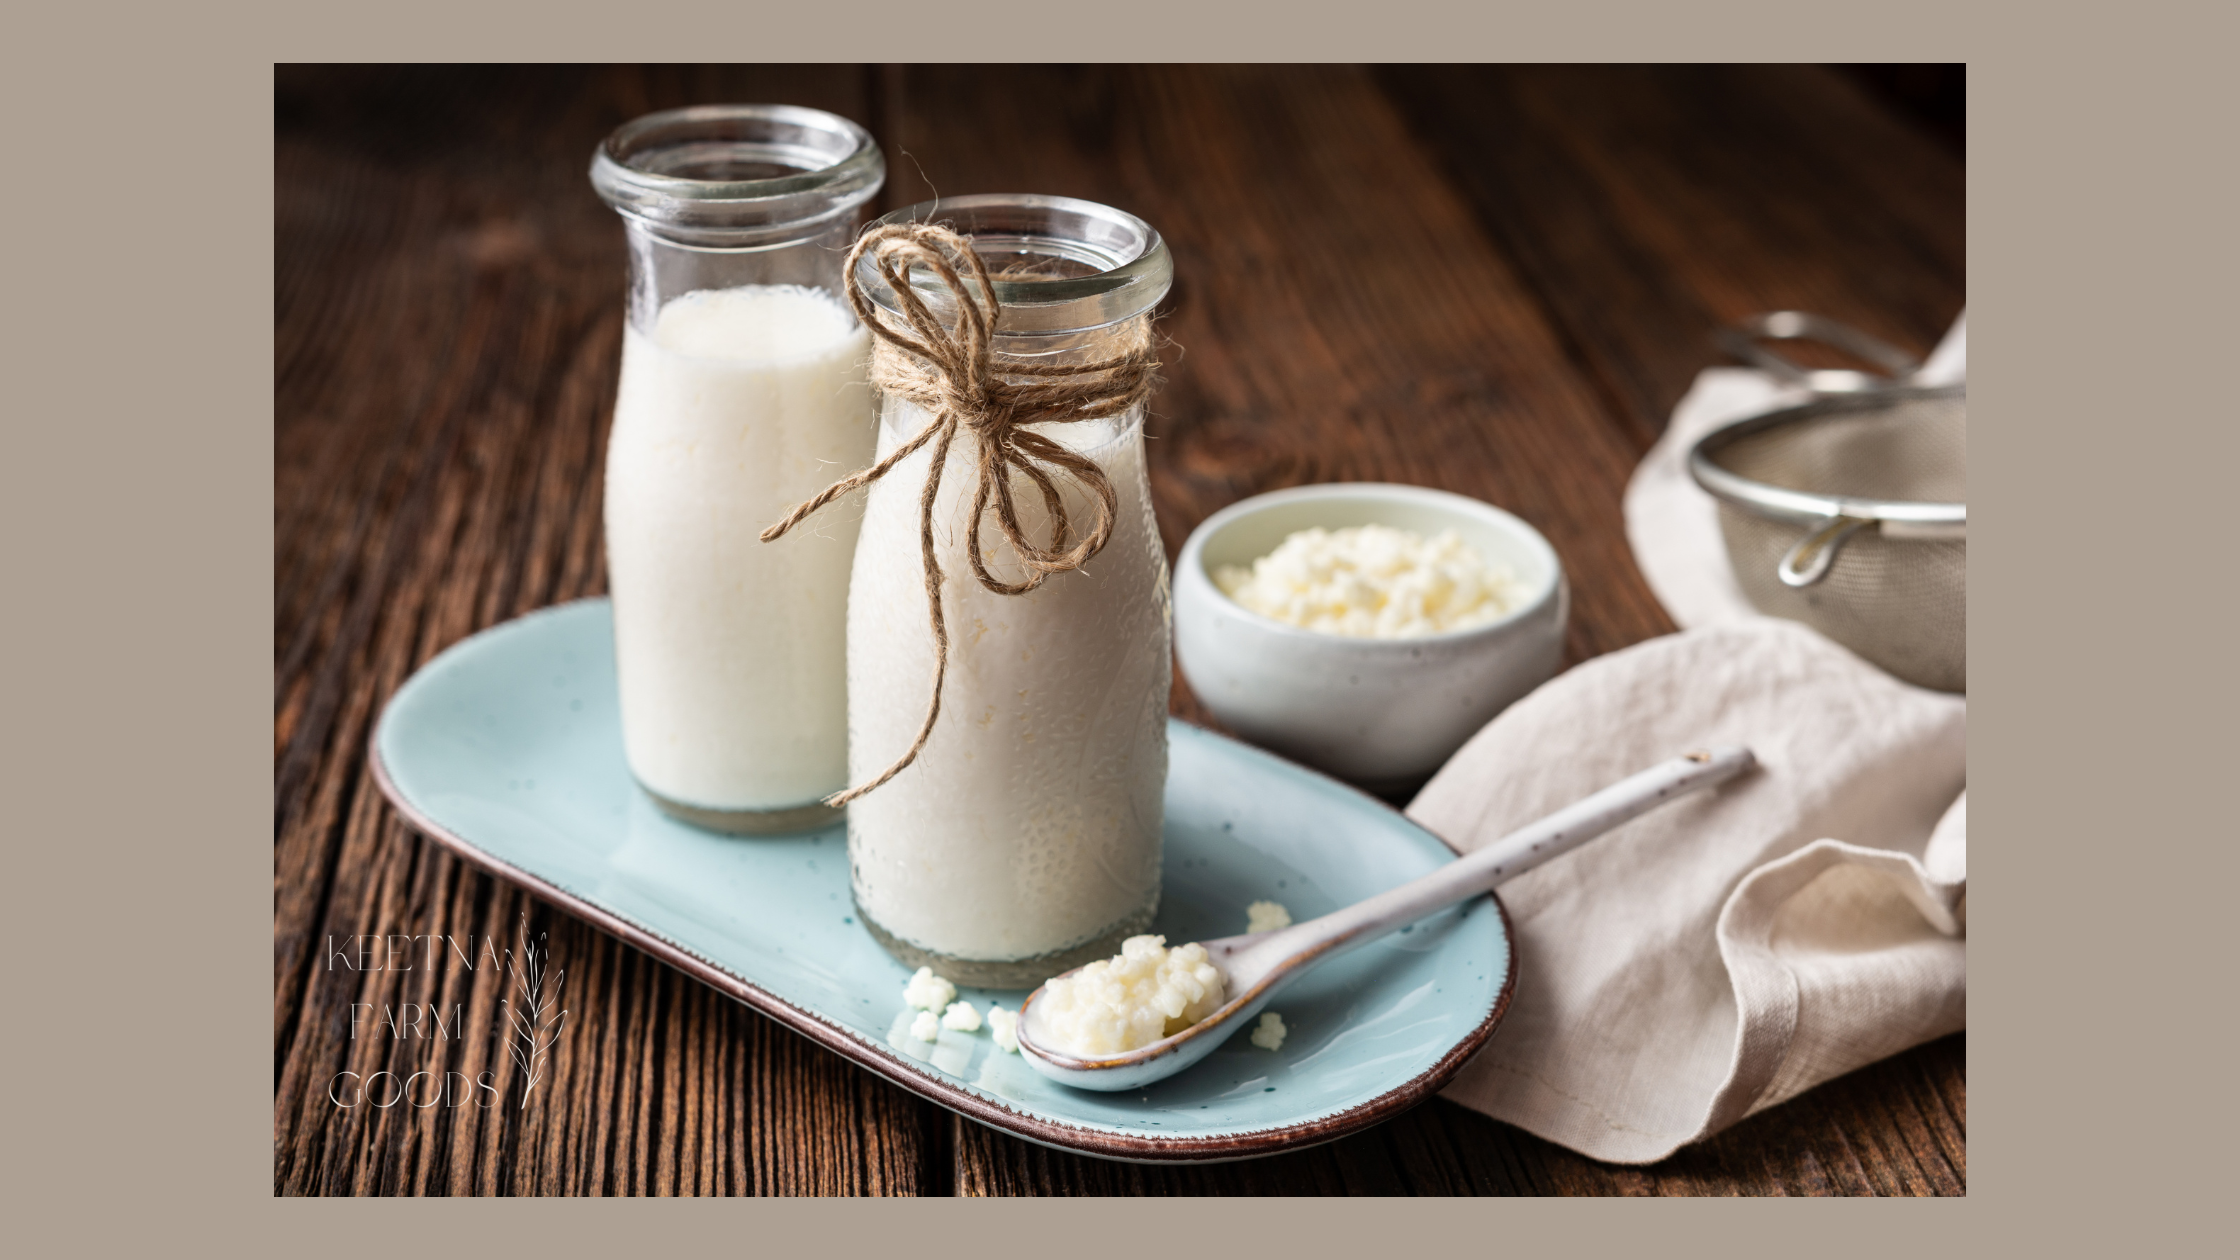
Add full kefir container contents to a pint size (2 cup) jar. No need to rinse your grains with water, please use them as is. Add the milk to fill the jar.
Stir gently.
Then cover the jar with the coffee filter or cloth. Use a mason jar ring or rubber band to secure. * I actually use one of our reusable waterproof jar covers and have excellent results every time.
Let this sit out on your counter for about 24 hours.
Longer fermenting gives you a more bubbles and a tangier taste. Have you ever heard of “The champagne of milk?” It can get very bubbly! You may notice the milk can get clumpy and will rise to the top…leaving the “whey” at the bottom of the jar. That’s OK!!! Just stir your grains/milk gently before you strain out your grains.

Strain your grains – simply hold your strainer over a bowl and pour out your fermented milk into the strainer. Then gently shake and jiggle the strainer – don’t be afraid to stir them a bit to help them drain. The fermented milk will separate from the grains…the runnier stuff first, then the thicker, creamier milk last. I find the best success with straining into a batter bowl with a pour spout, way easier to transfer to a jar for storage!
And that’s it! You’ll have your first batch of milk kefir to drink and enjoy. We store ours in a quart mason jar, with a lid, in the fridge. Some drink it warm, while others prefer to chill it in the fridge first. For drinking, we prefer cold. Baking, you can use it either way.
Making New Batches
The kefir may not ferment the milk as desired in the first 24 hours. That’s okay. Sometimes, the grains need time to adjust to their new conditions, especially after shipping. Just change out the milk for a new batch. Repeat the above process with each new batch.
Simply strain your “grains” and add them again to another jar of milk and ferment another batch. When you grains have “reawakened” and are fermenting at full speed…you can get a new batch of milk kefir every 24 hours.
Taking Breaks
If you do decide to take a break from fermenting, just put your grains in a small jar and cover them with milk (about ½ cup) and keep them in the fridge. They will stay dormant for several weeks without changing the milk.
Hints:
+ Kefir ferments best in 70 – 80 degree room temperature. Once “reawakened”, if your kefir doesn’t thicken with 24 hours, it is most likely that the temperature in your house isn’t quite warm enough. Find a warmer location and keep trying! I am in Alaska and our kitchen is a drafty 66 degrees for most of the year. I use a Brod & Taylor sourdough home set to 77 degrees for mine and have consistent success!

Homemade Milk Kefir
Just a couple of easy steps to make your own nutrient dense, probiotic drink!
Yield: 1 pint
Equipment
- Pint (2 cups) jar
- Cover for your jar
- Small strainer
Materials
- 1 Tbsp Active milk kefir grains
- 2 cups Fresh milk
Instructions
- Place contents from your kefir container into the jar.
- Fill the jar with milk.
- Cover the jar and let sit at room temperature for 24 hours.
Notes
Your First Batch
Add full kefir container contents to a pint size (2 cup) jar. No need to rinse your grains with water, please use them as is. Add the milk to fill the jar.
Stir gently.
Then cover the jar with your cover of choice *
Let this sit out on your counter for about 24 hours.
Strain your grains – simply hold your strainer over a bowl and pour out your fermented milk into the strainer. Then gently shake and jiggle the strainer – don’t be afraid to stir them a bit to help them drain. The fermented milk will separate from the grains…the runnier stuff first, then the thicker, creamier milk last. I find the best success with straining into a batter bowl with a pour spout, way easier to transfer to a jar for storage!
Place lid on jar and store in the fridge.
Milk Kefir Top FAQ
What if I’m lactose intolerant?
So… I am lactose intolerant. In my experience (and what I’ve found through lots of research) is that kefir is usually very safe for those who are lactose intolerant. The milk kefir culture actually eats lactic acid. So, the beverage becomes lactose-free as it ferments. Of course, you should be cautious when first experimenting with milk kefir, just to be safe.
Can I use a metal strainer & utensils?
I see some “experts” say you shouldn’t because the grains don’t like metal. I have seen similar things in the sourdough world. I will say that I use a metal strainer because we simply don’t have a lot of plastic items in the kitchen, so stainless is what I have. My grains (and sourdough starter) are many years old and thriving despite straining and stirring with metal utensils, so I suggest doing what makes sense for you.
What is the best covering for my kefir jar?
This is another situation where what I found works best for me, is not what the “experts” suggest. I used a breathable cloth cover for years and it worked, but my kefir wasn’t growing and thriving like I wanted. I took a leap and switched over to a waterproof lined cover and haven’t looked back. Do not be afraid to experiment! These grains are hardy, and hard to totally kill off so feel free to try different things – different temps, different locations, different cover types, using different tools and utensils. Figure out what works best for YOU, in your situation, in your kitchen.
There you go! All you need to know to make your own endless supply of probiotic goodness in your own home. I can’t wait to hear about your experience ~ comments, questions or concerns, be sure to let me know how it goes!